
Need to learn how to schedule Instagram posts for business accounts or personal accounts? This article shows you exactly how to do all of that, quickly and easily.
From creating the perfect images, editing high-resolution videos, writing compelling captions, finding the right hashtags, and publishing the posts, it takes a lot of time and effort to get results from Instagram marketing.
Scheduling Instagram posts in advance can help you save time so that you can focus more energy on your creative and strategic decisions. The more complex your strategy is, the more valuable it is to schedule posts.
When you automate publishing, you’ll be able to put out high-quality content consistently.
In this piece, we’ll cover three ways to schedule Instagram posts and some best practices for Instagram marketing.
How to schedule Instagram posts (for Business accounts)
Brands with Instagram Business accounts can use tools like Hootsuite to schedule posts across several social media networks, including Facebook, Twitter, Instagram, LinkedIn, Pinterest, YouTube and TikTok. You can schedule feed posts, carousel posts, Stories, and Instagram ads with Hootsuite.
If you’re more of a visual learner, watch this video to learn how to schedule Instagram posts with Hootsuite and Creator Studio. But if you like reading, keep scrolling.

If you don’t have a Business account or a Creator account yet, you might want to switch to make full use of Instagram tools for marketers. It takes less than two minutes to do.
1. Add your Instagram Business account to your social media management dashboard
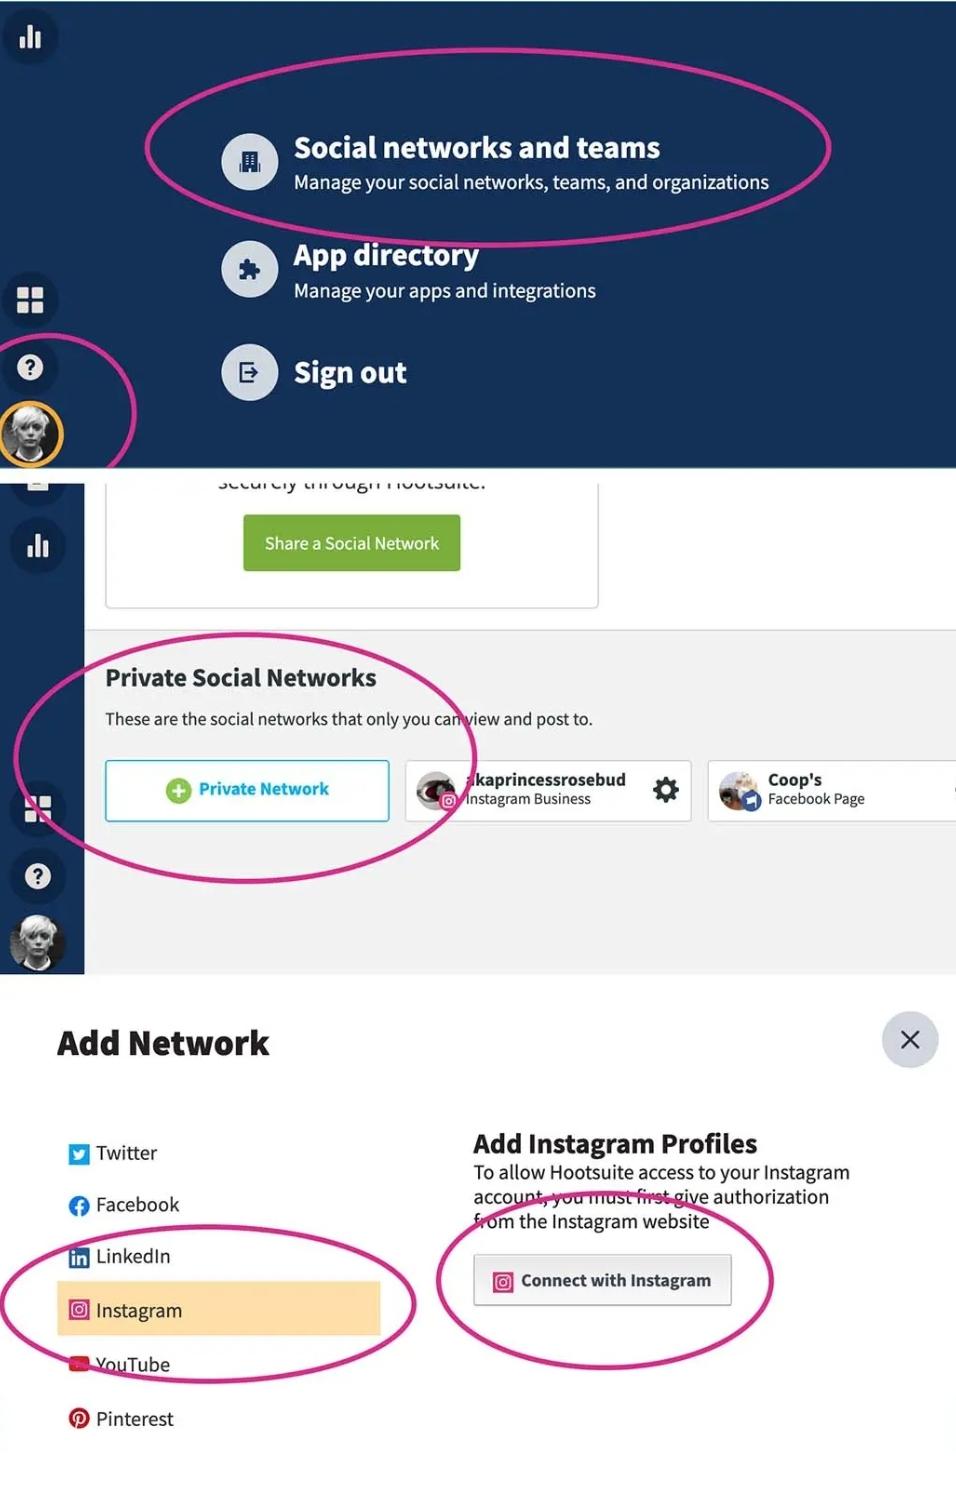
It’s easy to link your Instagram account to Hootsuite. Navigate to your Hootsuite dashboard, and:
- Tap your profile icon in the bottom left corner of the screen.
- Then, click Social Networks and Teams.
- Click + Private Network in the bottom left corner.
- Pick Instagram from the list of networks.
- Click Connect with Instagram.
- Enter your account username and password.
To learn more about doing this, check out Hootsuite’s comprehensive help article.
2. Craft your Instagram post
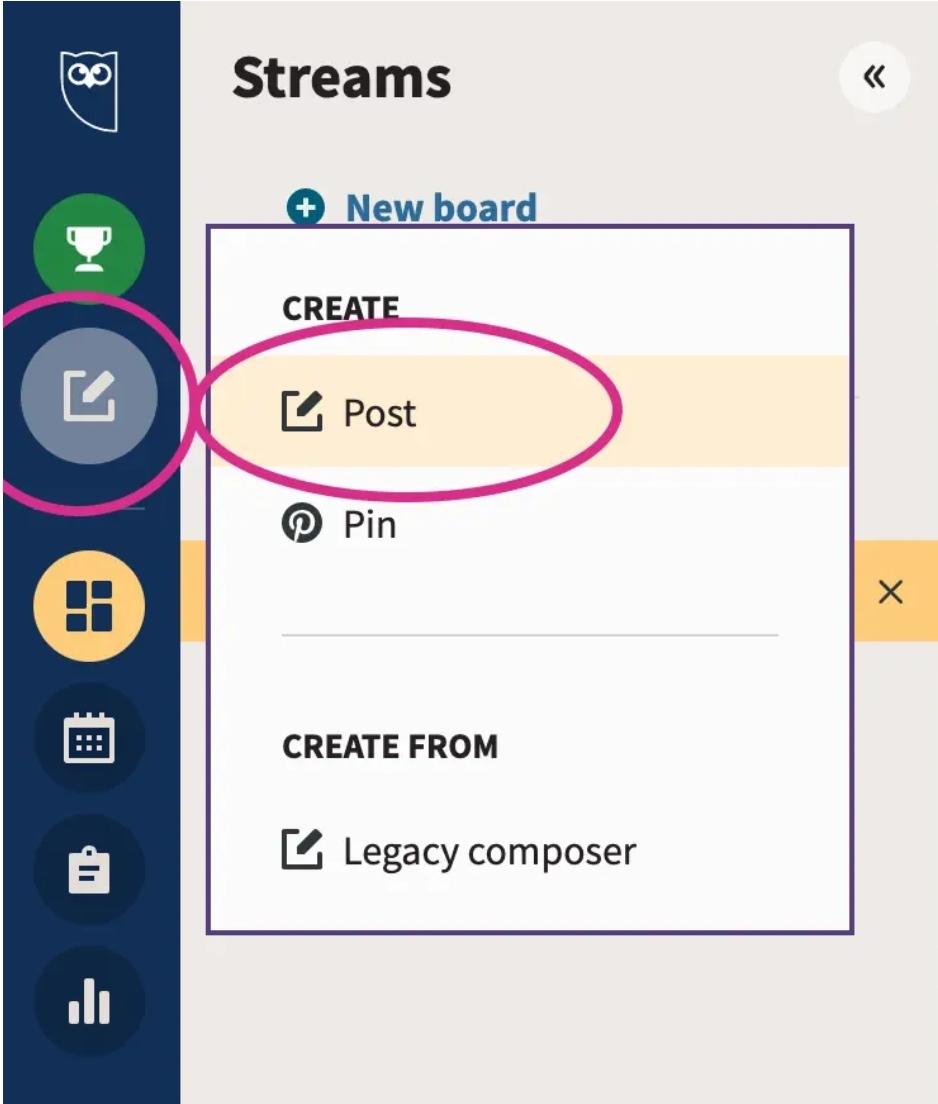
In the Hootsuite dashboard, tap the Create icon and select Post.
Choose your preferred Instagram account from the list in the Post To field.
Then upload your visuals (or get them from your content library). Next, write a compelling caption, put your hashtags, tag the right accounts, and add your location.
On the right, you’ll see a preview of your draft.
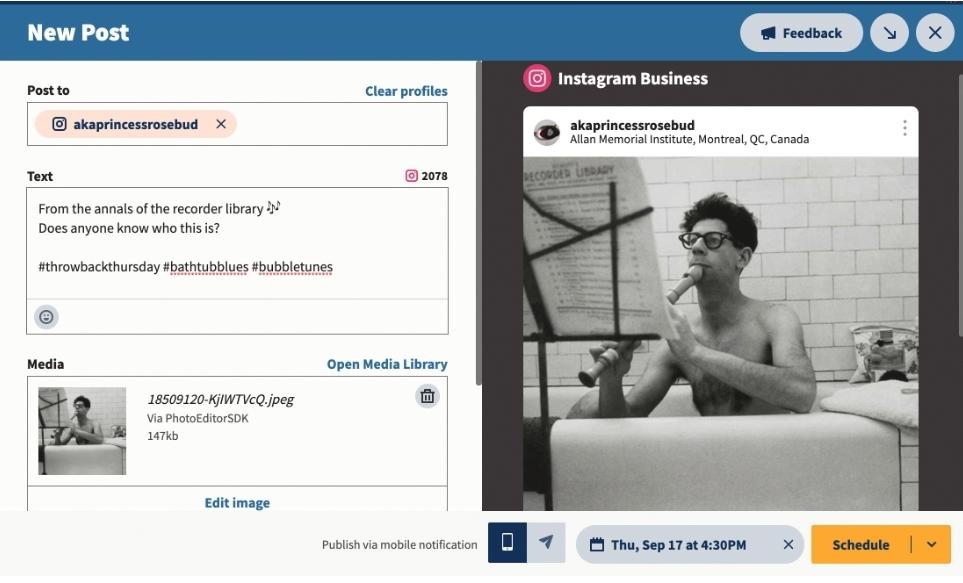
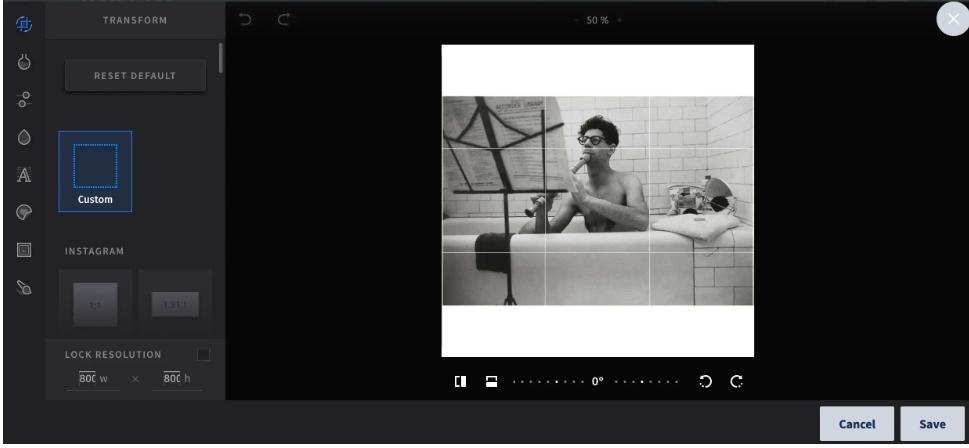
If your image isn’t ready for Instagram yet, you can edit it in Hootsuite. Click Edit Image to crop your image to the required aspect ratios (i.e., 1.91:1 or 4:5), and add filters and other embellishments.
You should take your time with this step. Instagram is a visual platform, so you want to post an image that will catch—and keep—the attention of your audience.
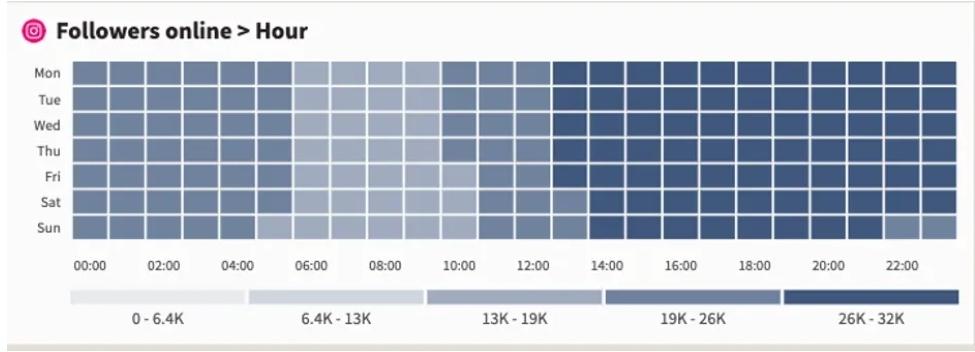
3. Find the best times to post
To get the most engagement, you need to post when your audience is online. This way, they can interact with your content and prompt Instagram’s algorithms to push your posts to more users’ feeds.
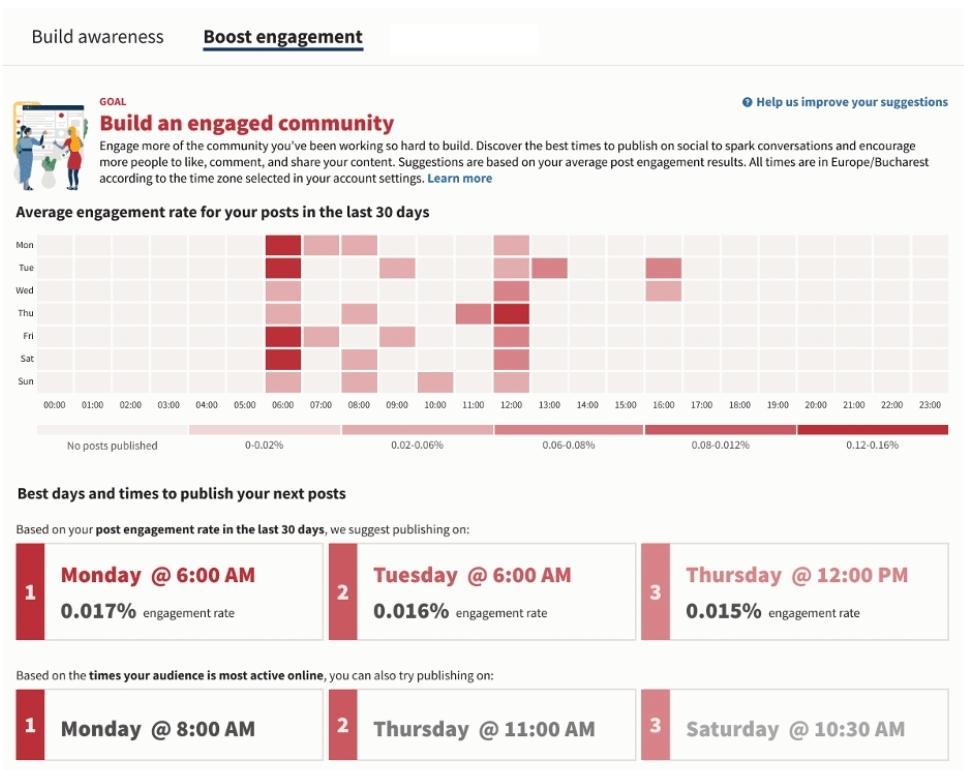
Hootsuite has a Best Time to Publish feature that analyzes your posts from the past 30 days and uses that data to recommend the best times to post on Instagram. This feature groups your posts by weekday and hour to determine posts that have had the biggest impact, based on average impressions and/or engagement rate.
To find the best times for you to post, save your post draft and do the following:
- Click Analytics in the left-hand side menu
- Then tap Best time to publish
- At the top of your screen, you’ll find a dropdown menu. Select your Instagram account from that menu
You’ll see a heatmap that shows your best times to post based on your account’s past performance. There are two tabs—Build awareness and Boost engagement—that will help you find the time that will work best for your goals.
4. Schedule your post
Now, here’s the main part.
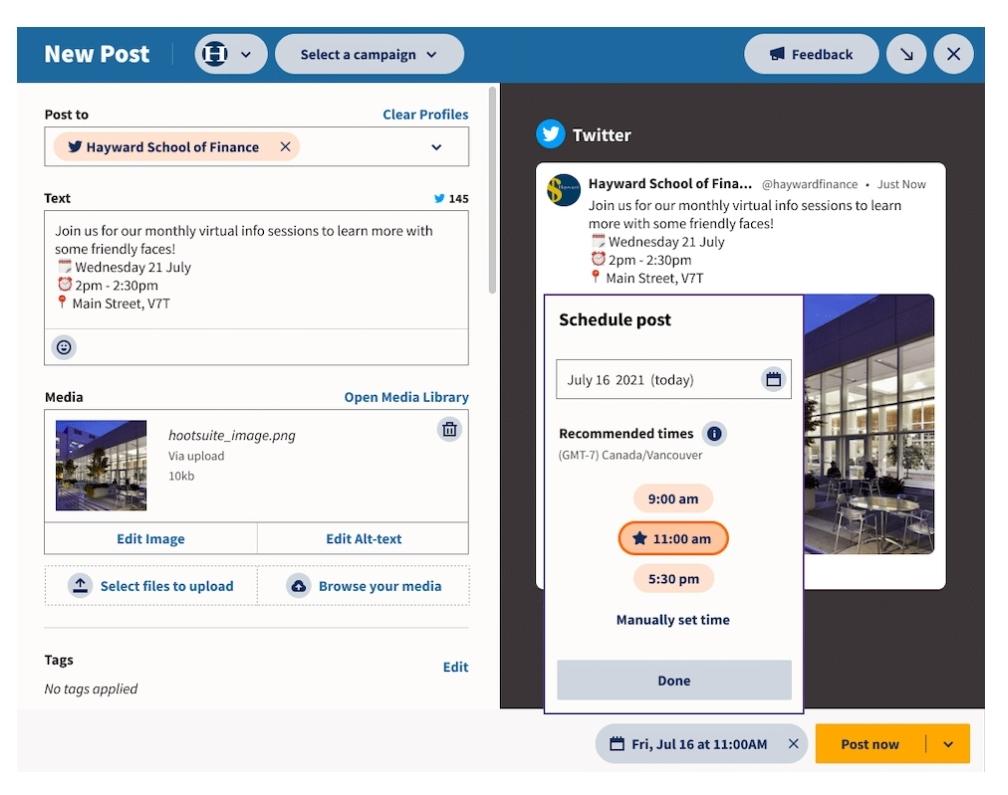
Click Schedule for Later in the bottom right corner, and select the date and time you want your post to go live. You’ll still see some recommended posting times after you select a date. You can pick one of them or set a time manually.
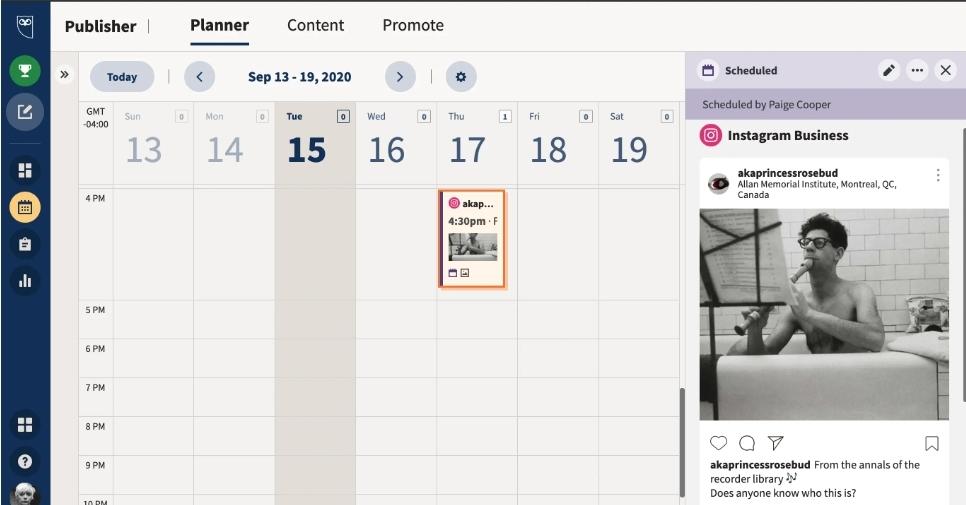
And voila! You’ve scheduled an Instagram post. You can see all your scheduled posts in the Hootsuite Planner, and edit them further before they go live (if you want to).
How to schedule Instagram posts (for personal accounts)
If you have a personal Instagram account, you can schedule Instagram posts with Hootsuite, too. It’s basically the same process as scheduling for Business accounts, but there are some extra steps. TL;DR: Hootsuite will send you a mobile push notification at the scheduled time. This will remind you to log in and click Publish.
1. Add your Instagram account to your social media management dashboard
From your Hootsuite dashboard:
- Click your profile icon in the bottom left corner of the screen
- Then, click Social Networks and Teams
- Click + Private Network in the bottom left corner
- Choose Instagram from the list of networks
- Tap Connect with Instagram
- Enter your account credentials
Next, you’ll want to set up the ability to use mobile push notifications. On your smartphone, do the following:
- Download the most up-to-date version of Hootsuite’s mobile app on your phone
- Open the app and tap your profile icon in the upper left corner.
- Navigate to Settings, and then Notifications
- Find your Instagram account in the list and turn on Send me a Push Notification
2. Create your post
You know how it goes: get your visuals, write a great caption, add your hashtags, tag relevant accounts, and add a location.
If you want to take things up a notch, check out our list of Instagram marketing tips. Or take a look at 2022’s Instagram trends.
3. Schedule your post
Know the major difference between business and personal accounts? Well, posts scheduled on personal Instagram accounts don’t go live automatically. Instead, you’ll get a mobile notification to remind you to click Publish.
Ensure you select the best time to post from the recommended times (or you can set your own time). Then click Schedule.
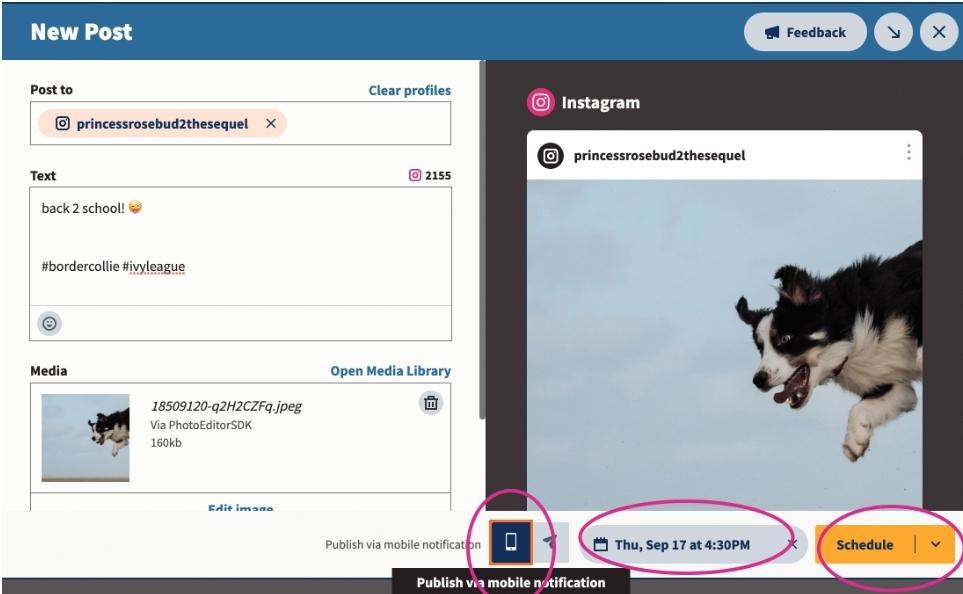
4. Publish your post
When the scheduled time arrives, you’ll get a push notification on your phone to remind you to publish the post. Basically, the Hootsuite app will do most of the work, but you’ll have to open Instagram, select your image, and paste your caption and hashtags.
The process isn’t difficult, but you should take a couple of minutes to cross-check and make sure everything is correct.

And that’s it!
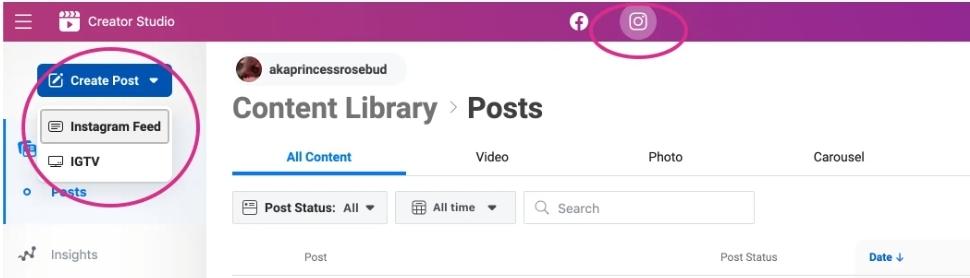
How to schedule posts on Instagram with Creator Studio
You probably know that Facebook (now Meta) is the parent company of Instagram. What you might not know, though, is that you can plan your Instagram feed on Facebook if you have a Business or Creator account on Instagram. Facebook’s Creator Studio allows you to create and schedule Instagram posts from your PC or Mac.
If you want to schedule Instagram and Facebook posts, Creator Studio is a good tool for that. But if you’re active on many social networks, it might be easier to use a social media management tool to publish posts to all social media channels from a single dashboard. A tool like Hootsuite can help you schedule posts to Facebook, Instagram, LinkedIn, Twitter, Pinterest, YouTube, and TikTok.
To schedule Instagram posts using Creator Studio, do the following:
- Link your Instagram profile to Creator Studio
- Click Create Post and upload your visuals. You can upload multiple images and videos to create a carousel post.
- Compose your post (write your caption, add hashtags, emojis, and mentions)
- Click the arrow beside the Publish button and select Schedule.
And you’re done!
5 best practices for scheduling Instagram posts
Once you’re ready to start scheduling your Instagram posts, these best practices will help you deliver your A-game.
1. Post content at optimal times
As mentioned earlier, posting content when your audience is online is important for increasing engagement. This is because Instagram’s algorithms prioritize recently. A newer post will show up in users’ feeds than older ones.
That’s why cross-posting isn’t really a good idea. Your Facebook audience may be active from 4-8 p.m. on weeknights, but browse Instagram from 12 noon – 3 p.m.
A good Instagram analytics tool will show you the times your audience is most likely to interact with your post. That’s actually what Hootsuite’s Best Time to Publish feature does. It analyzes your posts based on impressions and engagement rate and uses that data to determine the optimal times to post content.
Not only that, but it will also show you time slots that you haven’t used in the last 30 days so you can tweak your posting schedule and test new times.
2. Don’t schedule content too far in advance
Scheduling Instagram content one week in advance is great! Scheduling content one month in advance isn’t.
Scheduling content too far out increases the chances of something going wrong. The last thing you want to do is post something insensitive that results in a social media crisis for your brand. If this happens, you might have to pause your schedule completely.
Best advice? Stay nimble. Post one week in advance. Maybe two, if you’re daring. But no more than that.
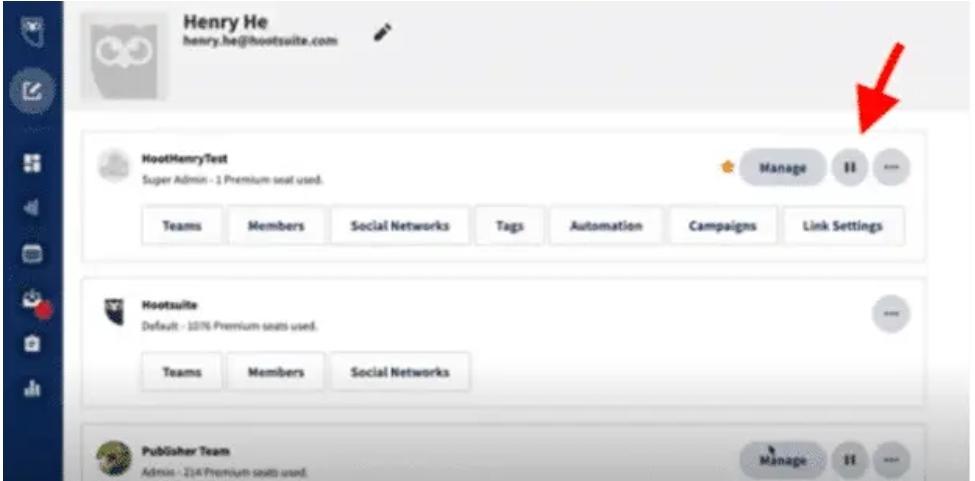
If you do schedule your posts too far in advance, just press pause on your Instagram scheduler, especially if a crisis or emergency occurs (you are using an Instagram scheduler, right?).
With Hootsuite, all you have to do is click the Pause icon on your profile and enter a reason for the halt.
3. Don’t spam your audience
A major perk of Instagram scheduling is that you can now increase the quantity of posts you publish without compromising on quality. But this doesn’t mean you should.
If you can maintain consistent quality at an increased pace over the long term, that’s great. But when it comes to social media engagement, consistency trumps frequency. The algorithm pays more attention to how often your audience engages with your content.
4. Optimize and edit your posts
Before your posts go live, take another look at your social copy to ensure that there are no spelling and grammatical errors, or worse, offensive slurs/innuendos/opinions.
If you have a big team, there should be an internal multi-stage approval system in place to prevent mistakes like these.
Apart from your copy, also cross-check your visuals. Use an Instagram scheduler to edit your images in the same dashboard you’re publishing them from. Optimizing your images before posting will save you a ton of time and ensures that everything looks great.
Hootsuite’s image editor can help you do this. With this tool, you can crop your image to the right size for any social media channel. There’s an extensive filter library that you can use to edit your visuals.
Here’s a video that shows you a preview of the tool.

5. Analyze and adjust
Now that you know how to schedule Instagram posts, take a step back and look at the big picture.
Is your Instagram content relevant to your audience? Are your followers liking, sharing, and commenting on your posts? What’s not working for you?
Get an Instagram analytics tool and start collecting this data.
Save time by using Hootsuite to schedule your Instagram posts, engage with your auldience, and measure performance all from a single dashboard.